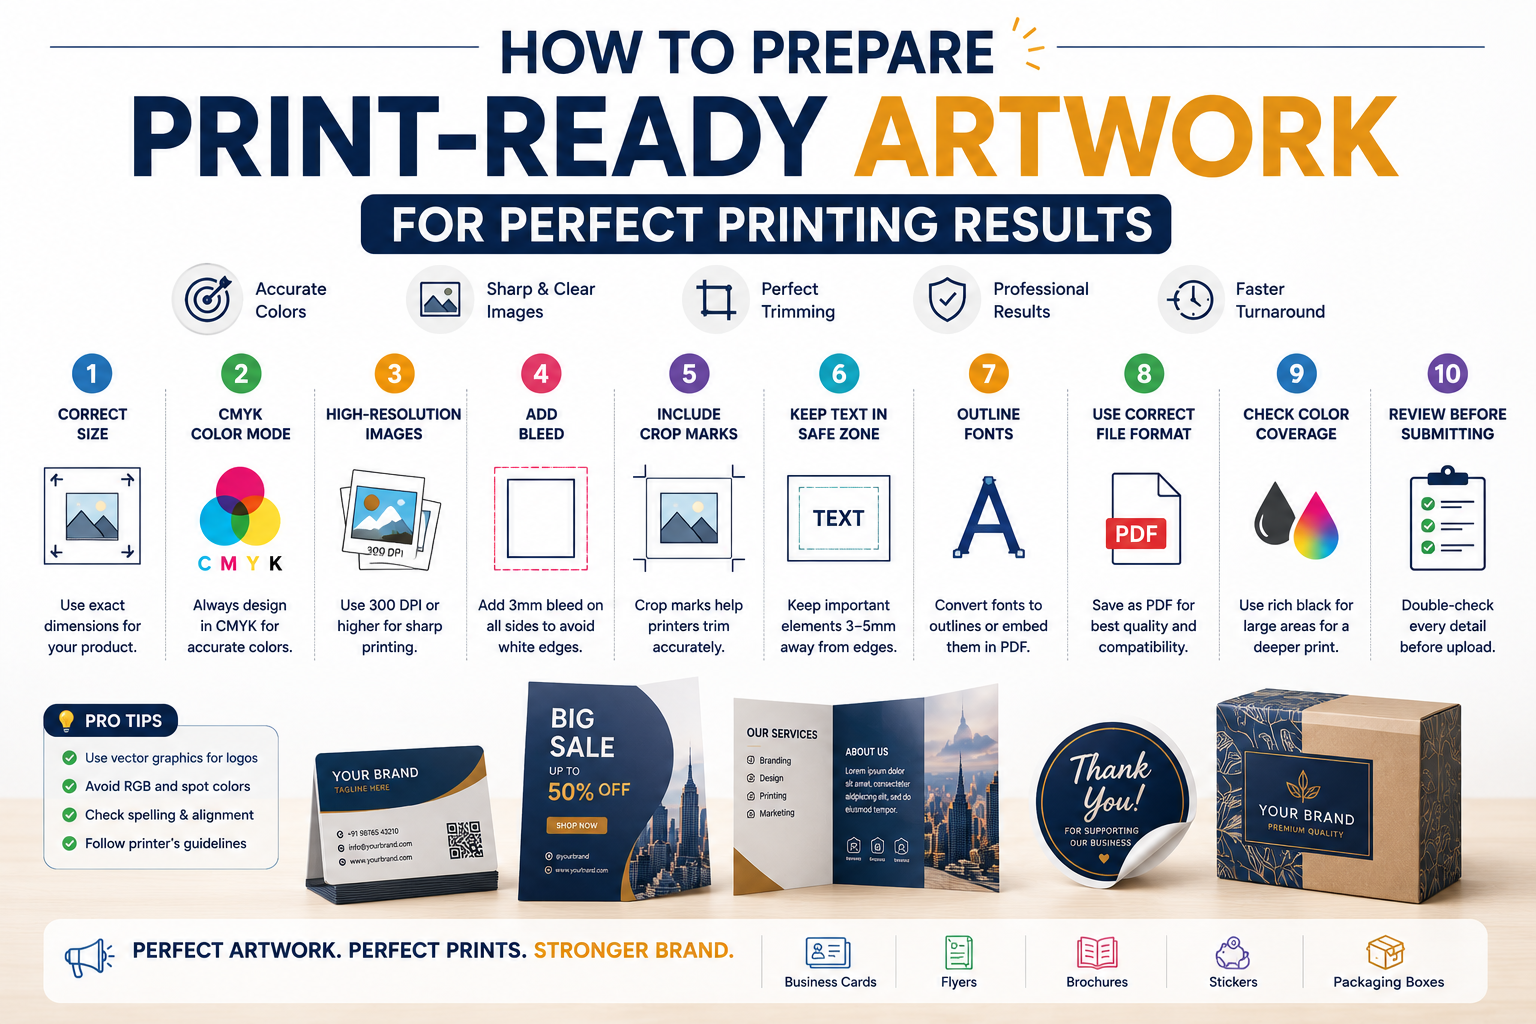
Learn how to create a print-ready file with CMYK printing, bleed and crop marks, high-resolution images, and proper formatting for professional printing results.
Creating a beautiful design is only half the job. To achieve professional and high-quality printing results, your artwork must be prepared correctly before it goes to print. Whether you’re ordering Business Card Printing, Sticker Printing, Brochure Printing, Flyer Printing, or Packaging Box Printing, having a proper print-ready file ensures your final product looks exactly as intended.
Many printing issues such as blurry images, incorrect colors, cut-off text, and misaligned designs occur because artwork files are not properly prepared. Understanding essential printing requirements like CMYK printing, bleed and crop marks, image resolution, and file formats can save both time and money.
In this guide, we’ll explain everything you need to know to prepare print-ready artwork for perfect printing results.
What Is a Print-Ready File?
A print-ready file is a digital design file that contains all the necessary settings and specifications required for professional printing. It is optimized so the printing machine can reproduce your design accurately without unexpected errors.
A print-ready file typically includes:
· Correct document dimensions
· CMYK color mode
· High-resolution images
· Proper bleed area
· Crop marks
· Embedded fonts or outlined text
· Correct file format (usually PDF)
When using Online Printing Services, submitting a properly prepared file helps ensure faster processing and better results.
Why Preparing Print-Ready Artwork Matters
Professional printing equipment reproduces designs differently than computer screens. A design that looks perfect on your monitor may produce unexpected results when printed if it is not prepared correctly.
Benefits of a properly prepared print-ready file include:
· Accurate colors
· Sharp images and graphics
· Proper trimming
· Professional appearance
· Faster production times
· Reduced risk of reprints
Whether you’re ordering Custom Printing India services or large-scale branding materials, artwork preparation is critical for quality output.
Step 1: Use the Correct Document Size
Always design your artwork at the exact size required for printing.
For example:
· Business Cards: 3.5” x 2”
· Flyers: A5, A4, or custom sizes
· Brochures: Bi-fold or tri-fold dimensions
· Stickers: Custom shapes and sizes
· Packaging Boxes: Based on dieline specifications
Never create artwork smaller than the final print size and enlarge it later, as this can reduce quality.
Before starting your design, confirm the exact dimensions with your printing provider.
Step 2: Design in CMYK Color Mode
One of the most common printing mistakes is designing in RGB color mode instead of CMYK.
RGB vs CMYK
RGB (Red, Green, Blue) is used for digital screens such as:
· Computers
· Smartphones
· Tablets
CMYK (Cyan, Magenta, Yellow, Black) is used for professional printing.
This process is known asCMYK printing.
Why CMYK Is Important
RGB colors often appear brighter and more vibrant on screens. When converted to CMYK, some colors may look different.
Examples:
· Bright neon colors may become duller.
· Certain blues and greens may shift slightly.
· Highly saturated colors may lose intensity.
To avoid surprises, always create your artwork in CMYK mode from the beginning.
This is especially important for:
· Business Card Printing
· Brochure Printing
· Flyer Printing
· Packaging Box Printing
· Branding Materials
Step 3: Use High-Resolution Images
Image quality plays a huge role in print results.
Recommended Resolution
For professional printing:
· Minimum: 300 DPI
· Preferred: 300 DPI or higher
Problems with Low-Resolution Images
Low-quality images may appear:
· Blurry
· Pixelated
· Soft
· Unprofessional
Images downloaded from social media or websites are often only 72 DPI and unsuitable for printing.
Always use original high-resolution files whenever possible.
This is particularly important for:
· Product packaging
· Promotional flyers
· Company brochures
· Sticker Printing
Step 4: Add Bleed to Your Artwork
One of the most important aspects of print preparation is adding a bleed.
What Is Bleed?
A bleed is an extra area that extends beyond the final trim size.
Printers typically require:
· 3 mm bleed on all sides
· Or 0.125 inch bleed for some international standards
Why Bleed Is Necessary
Printing and cutting machines have slight tolerances.
Without bleed, tiny shifts during trimming can leave unwanted white edges around your design.
Example
If your flyer size is:
210 mm × 297 mm (A4)
With 3 mm bleed, your artwork should be:
216 mm × 303 mm
The extra area gets trimmed away after printing.
This ensures edge-to-edge color and graphics.
Step 5: Include Crop Marks
Another important element is crop marks.
What Are Crop Marks?
Crop marks are small lines placed outside the artwork that indicate where the final trimming should occur.
They help printers:
· Trim accurately
· Maintain consistency
· Avoid cutting important content
Bleed and Crop Marks Work Together
Think of it this way:
· Bleed extends beyond the trim line.
· Crop marks show where trimming happens.
Using proper bleed and crop marks helps produce clean and professional printed materials.
Step 6: Keep Important Elements Inside the Safe Zone
Besides bleed, every design should have a safe zone.
What Is a Safe Zone?
A safe zone is the area inside the document where important content should remain.
Important elements include:
· Logos
· Phone numbers
· Addresses
· Headlines
· QR codes
Keep these elements at least:
· 3–5 mm away from the trim edge
This prevents accidental cutting during production.
Step 7: Convert Fonts to Outlines
Fonts can create unexpected problems if they are missing on the printer’s system.
Common Issues
· Font substitution
· Text shifting
· Layout changes
To avoid these issues:
· Convert text to outlines
· Or embed fonts in your PDF
This ensures your typography appears exactly as designed.
Step 8: Use the Correct File Format
The most widely accepted print format is PDF.
Recommended Formats
· PDF (Preferred)
· AI (Adobe Illustrator)
· EPS
· TIFF
Avoid
· Screenshots
· Word documents
· PowerPoint files
· Low-quality JPEG files
A high-quality PDF preserves:
· Colors
· Fonts
· Images
· Layouts
Most Online Printing Servicesrecommend PDF files for best results.
Step 9: Check Color Coverage and Rich Black
When printing dark backgrounds, standard black may not appear deep enough.
Standard Black
C:0 M:0 Y:0 K:100
Rich Black
C:60 M:40 Y:40 K:100
Rich black creates a darker and more premium appearance for large black areas.
However, use standard black for small text to avoid registration issues.
Step 10: Review Your Artwork Before Uploading
Before submitting your file, perform a final quality check.
Artwork Checklist
✔ Correct dimensions
✔ CMYK color mode
✔ 300 DPI images
✔ Bleed added
✔ Crop marks included
✔ Fonts embedded or outlined
✔ Safe zone maintained
✔ Correct file format
✔ Spelling checked
✔ Logos positioned correctly
This final review can prevent costly mistakes and delays.
Common Print File Mistakes to Avoid
Many businesses unknowingly submit files with avoidable errors.
Mistake #1: RGB Colors
Results in color shifts during printing.
Mistake #2: No Bleed
May create unwanted white borders.
Mistake #3: Low-Resolution Images
Produces blurry output.
Mistake #4: Text Too Close to Edges
Risk of important information being trimmed.
Mistake #5: Incorrect File Format
Can delay production and approval.
Avoiding these mistakes improves overall print quality and customer satisfaction.
Print-Ready Artwork for Different Products
Business Card Printing
· Include bleed
· Use CMYK
· Maintain safe margins
· Export as PDF
Flyer Printing
· Use high-resolution images
· Check color consistency
· Include crop marks
Brochure Printing
· Verify fold placement
· Maintain safe zones
· Use professional PDF exports
Sticker Printing
· Follow cut-line specifications
· Use vector graphics when possible
· Add bleed around custom shapes
Packaging Box Printing
· Use supplied dielines
· Extend artwork into bleed areas
· Check panel alignment carefully
Conclusion
Preparing a proper print-ready file is one of the most important steps in achieving professional printing results. By using CMYK printing, adding correct bleed and crop marks, maintaining high-resolution images, and exporting the right file format, you can ensure your printed products look sharp, vibrant, and professional.
Whether you’re ordering Business Card Printing, Sticker Printing, Packaging Box Printing, Brochure Printing, or Flyer Printing, following these best practices will help you avoid costly errors and achieve exceptional results.
As the demand for Online Printing Services continues to grow, businesses across India are increasingly relying on professional Custom Printing India providers for high-quality Branding Materials. Preparing your artwork correctly ensures every print project reflects your brand in the best possible way.